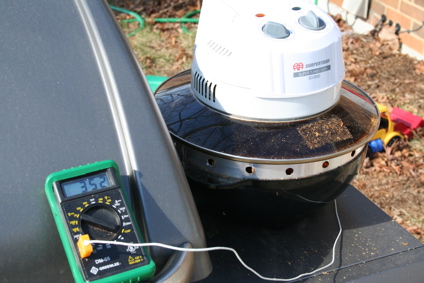
[The SC/TO showing off it's thermocouple in action.]
|
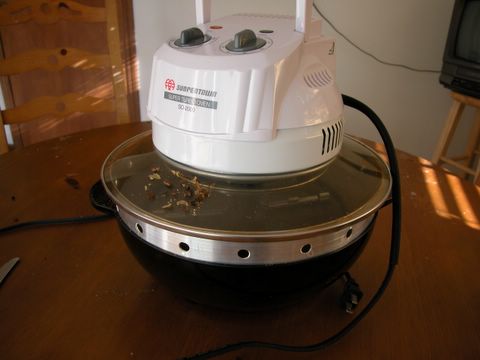
The Turbo Crazy isn't my design, but I liked the concept. I wanted something to roast bigger batches than my popper. I asked the Home-Roasters list at Sweet Marias, and had several people suggest the Turbo Crazy.
My first impression was that it's FAR quieter to use than an air popper. My second was that it holds a HUGE amount of coffee compared to the good ol air popper.
I would reccomend that first time roasters start out with an air popper, in order to tune their roasting with small batches.
Once you know what you're looking for in your roasts, the Turbo Crazy is a great way to increase your batch size.
On my first roast of UGH, the plastic nut deformed and melted.
The biggest design flaw is the plastic shaft that the stirring rod bolts to.
Most people end up installing a new threaded metal shaft to hold the stirring rods in place. [The SC/TO showing off it's thermocouple in action.] |
|
|
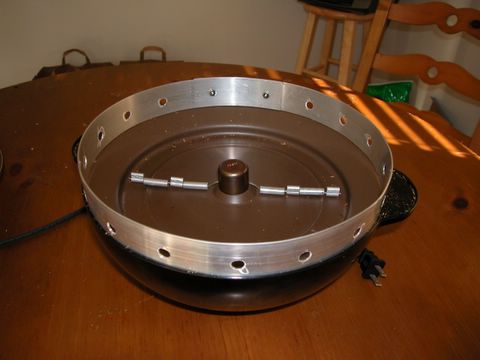
Parts List:West Bend Stir Crazy Popcorn Popper - $35 at Target.Suppentown SO-2000 Turbo Convection Oven - $65 at NewEgg.com 1 1-1/2"x1/16"x4' Aluminum Flat - $5 ACE Hardware 2 #8 stainless screws + nuts - $.25 ACE Hardware 4 1"x1/4" aluminum spacers - $3 ACE Hardware 4 crimp on aluminum cable clamps - $2 ACE Hardware 1 1" Copper pipe cap - $.89 Lowes 2 1/4x20 Stainless nuts 1 3/8" Stainless washer Stirring shaft mod1 1/4" drive 7/16" socket1 2"x1/4" hex bolt 4 1/4" nuts 4 1/4"x1" washers 1 1/4" flare washer Stirring Shaft Mod Page |
Aluminum SpacerThe first order of buisness is to build the aluminum spacer. Begin by curling the aluminum around into a circle and try test fitting it into the lip on the top of the stir crazy. Once you have a good idea, go ahead and start bending the metal so it stays in the general shape. Next you'll want to allow 3-4" of overlap, and cut off the extra metal. Put the piece back on the stir crazy. Holding it snugly against the lip of the stir crazy so it will have a slight friction fit, drill the holes and use the #8 machine screws to hole it together. Once you're happy with that, mark the aluminum every 2 inches and drill 3/8" holes all around. You may want smaller holes if you live in a cooler climate. I did not drill holes where the overlap occurs, so I can drill a more stable hole to hold a thermometer probe. |
|
|
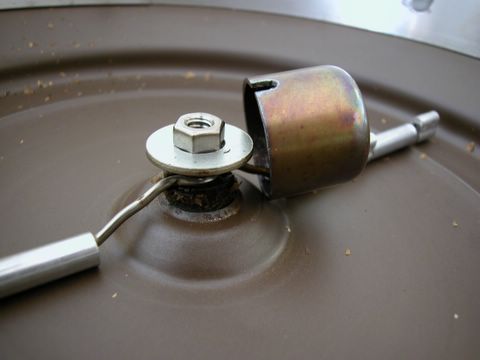
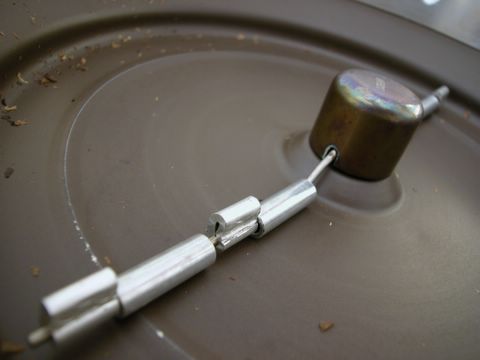
Copper CapIn order to keep the heat away from the plastic stirring shaft, I added a 1 inch copper cap. On one side I drilled a hole for the stirring rod to pass through. I cut a slot opposite the hole using my rotary tool(dremel). When the popper is emptied, the cap may flip up, but it won't fall into your fresh roasted beans. The 3/8" (inner diameter) washer keeps the cap centered over the nut and stirring rod assembly. |
Stirring PaddlesThe small stirring rod is fine for agitating popcorn, but for 1/2 to a pound of coffee, it's not sufficient. Here you can see the cap in the normal roasting position, and the spacers and crimped additions. Other's have used 3/8" copper pipe, crushed down on the rods with vise. I used my bench vise to install the crimp adapters. So far I'm happy, but I may change to the copper pipe later. |
|
|
|
Tweaking the CrazyDisconnecting the heating element:Remove the 4 screws on the bottom panel of the stir crazy. Carefully disconnect the connectors leading to the heating unit. I suggest taping over the now loose connectors and bending the wires away from anything they could short across. |
Enjoy Roasting!Sweet Maria's Classic Italian Espresso blend just after cooling. Roasted in the Turbo Crazy, with heater disabled and holes in the ring.In truth probably entirely too light of a roast, but it shows how even the roast is. |

|