Biobug.org

Projects, notes, etc by Will O’Brien

Entries


My WishList
Resume
Want My Coffee?

Production

Photo Gallery
Articles
Podcasting
News

Amusements

Audio
Brewing
Cigars
Coffee
GPS/GeoCaching
Hacks
Home Theater
Kayak
Machine Shop
Photography
Recipes
SCUBA Diving

Research

CNC
CAD
Scripts
VR Interface
Environment
KarKomp
KarKompV2
MythTV

Reference

OWLNet
Quit Soda
Mac
Linux
Tech Ref
Panasonic Toughbook
Dreamhost hosting

Communication

Blackberry
T-mobile MDA
Danger Sidekick
WRT54G(s)

Transport

Land Rover
4Runner
Beetle
Jeeps
Motorcycles
EV Motorcycle
About
Links
Search

Netscreen 5gt: best home firewall for the money?

9 November, 2009 (11:07) | Uncategorized | 3 comments

Netscreen 5gt

Netscreen 5gt

I have a habit of using better than average hardware for my home network. In truth, I prefer near enterprise class if possible.

The Netscreen 5gt is the precursor to the current Netscreen SSG5. The SSG5 is a great box, 120MB throuput, 6 interfaces, multiple virtual routers, etc. The 5gt went end of sale on December 31st, 2008. However, it’s still going to be software supported until December 31, 2013! There is a catch: Juniper.com won’t let you download new software unless you registered the device when it was new.

So, if you can work around the download issue (like buying a device from a vendor who includes the latest updates) you can have a stateful firewall that’ll do advanced networking. Compared to the SSG5, the 5gt is a little bit lame – somewhat annoying port names and limited port reconfiguration. Still, the device will do far more than the average cheap nat box.

If you have deeper pockets, go for either an ssg5 or… a new SRX 100 series. I’ve demo’d the SRX (and have a few on the way for production) and they’re very nice boxes. They run junos and the throughput is general doubled for the money on a similar netscreen. However, an older 5gt will only run about $50 on ebay.

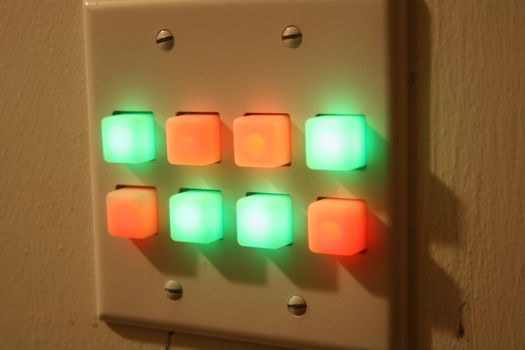
CNC back online… new bezels coming soon!

7 November, 2009 (00:12) | Projects, Toys | 2 comments

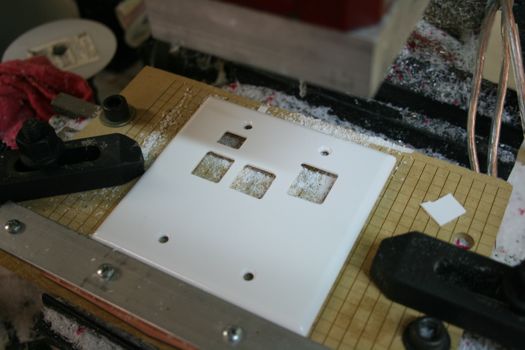
keypad bezel smilin

I’ve been too busy to sort out my workshop for a while, but thanks to the delivery of a small Dell machine (thanks to Eric’s basement!) I’ve got a dedicated box assigned to run XP and Mach3 on my mill.

test cut via hand jogging

I did a quick test cut and it looks like I’ll have no problem producing new bezels for the RGB keypad soon. I’ll have to check and see if SparkFun want’s to carry them again, but if not they’ll be available directly from my store. Now I just have to rebuild my design/cad/cam machine and we’ll be golden.

If you’re desperate for a bezel, comment and I’ll see what I can do for ya.

Mediacom DNS appears to have gone lame(sigh)

24 October, 2009 (12:33) | networking |

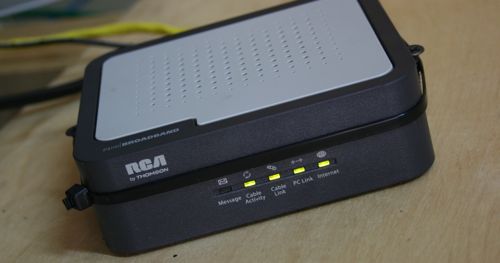
cable-model

Since my home network is a bit more complex than most, I found some interesting issues with Mediacom’s DNS. Yesterday, our wireless network stopped working (My wife reports that to me: the internet is down, did you pay the bill?) I could ssh in from work, so the connection was definitely working.

A bit of poking around and I find that the old primary DNS server isn’t even responding to queries. Luckily, I run my own dns server on my inner network and it works just fine. My fix for now is to allow a special NAT exception so that my internal dns server and supply dns for every network zone in my house.

I would hope that a full dhcp renewal would provide new, working DNS servers. But ultimately I don’t care since my fix was just a reversion to my old network config anyway.

Fantastic XKCD based animation

22 October, 2009 (08:48) | Uncategorized |

I Love xkcd from NoamR on Vimeo.

Need I say more? Really?

And now, some LOLrouters

21 October, 2009 (15:16) | Uncategorized |

I finally got around to making up my little LOL cats inspired geekery:

ichmzomgrouter

My network and my network lab at work: Awesome.

21 October, 2009 (09:23) | Toys | 2 comments

I’m lucky to have a very nice lab to test and support my network at work. Just a few things that I’ve got at my (groups) disposal:

Juniper MX960 Routers:

This is the latest addition to the network. I have a pair in production with 10Gb uplinks receiving full BPG routes from I1, I2 and native IPV6. I managed to talk our provider into a dedicated 1Gb link for my lab (which is converted to 10Gb for the MX by a Nortel 5530) Thanks to this (and a pile of fiber), I was able to prototype our full redundant config before going live with it. I even managed to secure a /24 that I advertise via BGP for live connectivity. These supply per IP bandwidth policing (across two class Bs), generate default routes into OSPF for everything else and they are fully redundant – both routers mirror every function. I can boot one at anytime with no consequence aside from a BGP flap to my provider.

Tipping Point SMS, Core Controller, 2400E IPS and 1200 IPS:

Before I implimented the MX routers, I had to update our campus IPS. On our edge, we use Tipping Point hardware. The IPSs use FPGAs on several Gb links to do initial, line speed analysis. In depth analysis is done by intel CPUs as needed. (The next generation is even better…) By using a Core Controller, we split the 10Gb link into multiple 1Gb links that are processed by several 2400E IPS units. The signature updates from TP are excellent, and the benefits of using the system on our network are impressive.

Juniper M20 Routers:

Our old border routers. I use these to simulate the multiple router setup in production since it’s hard to justify a pair of MX960s just for lab/hardware spare use.

Nortel ERS8600 Layer 3 switches

Our core aggregation switch. These handle multiple link redundancy, 10Gb core up and cross links and do just about everything you can think of.

Nortel 5500 and 5600 GigE swtiches (The edge switches used across campus)

I have a small pile of these switches for testing code, simulating production

Netscreen 5400 Firewall:

Our core uses four of these in redundant(ish) pairs. There are a few single connected services but they mostly back each other up. These protect our data center and user networks. Again, core connections are 10Gb. :)

Lay out your plywood projects on your PC

10 October, 2009 (22:56) | Uncategorized |

Every so often I spend some time with a pad of paper and draw out something I need to build. In this case, I need to make drawers and a door for my espresso bar. I found a handy little program (it could use some polish, but it does the job) for calculating the layout of plywood cuts. It’s called Cut List and does just that. It’s free and it’ll run on windows. I’d like to see some mac software for this – if anything the printouts would look better on my laser printer.

Whiteboard paint… finally

7 October, 2009 (17:25) | Projects, Toys | 1 comment

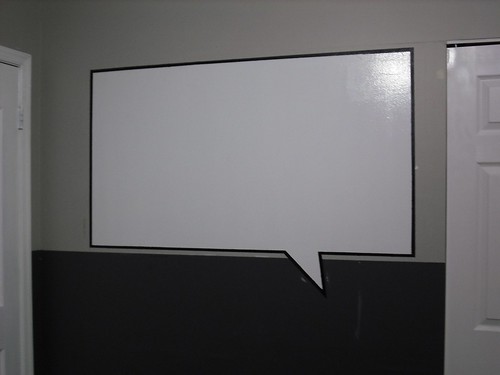
I put up a cheap whiteboard in my home office earlier this year. I couldn’t find a decent solution at the time. Today I ran across this. It’s whiteboard paint by rustoleum. Apparently, it can be found at home depot… Guess what my garage will will be getting sometime soon.

This whiteboard has magnet grabbing paint underneath it. Nice!

Henriks’ triple (with the triumph fork)

6 October, 2009 (16:53) | Projects, Uncategorized |

I had quite a few comments looking for Henrik afterI posted a pic of his bike. A short while after I put it up, I found it in the how-to section at yamaha-triples.org. It’s hidden on the second page under ‘fitting a triumph fork‘.

This was especially hepful to me as I’ve been plotting to put a GSX-R fork on the front of my 850. It’s coming along – I’ve got the triple tree, wheel, rotors and some Yamaha R1 brakes ready to go on it. I’ve obtained the custom bearing I needed up top and finally ordered the lower bearing and seals I need to get things mounted up. I’ll post more when all the parts show up. I’ll be running a smaller GSX-R wheel, but I’ve also got a smaller rear wheel since it’s a special. Hopefully it’ll come out looking great…

Portafilter seal replacement tricks

4 October, 2009 (10:54) | Uncategorized | 1 comment

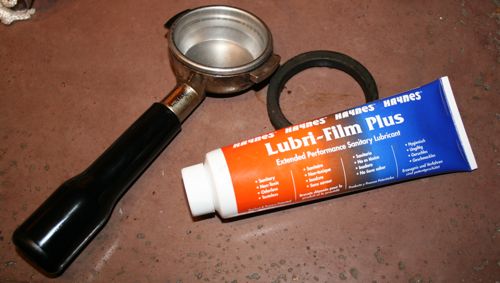
pf-filter-lube

I did a little maintenance on my ECM Giotto espresso machine today. My portafilter seal had started leaking recently, so it was a good time to do it. A well used machine will typically need the portafilter seal replaced every six months or so. If you stretch it, it may be a couple of years, but eventually you’ll have to do it.

Not so tricky – Places to find parts:

Theory says that local shops will have what you need. In practice, it’s very difficult to buy locally. Most coffee shops only deal with a certain brand of machine and they usually look at you funny if you ask about seals and things for other ones.

These are some of my favorites: Espresso Parts and Chris Coffee. Both have proven to be fantastic for supplying the odd espresso machine part. I’ve challenged a few parts shops with my projects in the past and both of these vendors passed my tests with flying colors. (You try finding a replacement boiler in the US for something hand made in Italy…)

Trick 1: Removing the old seal:

use a drywall or wood screw and gently screw it into the seal. Even if the screw doesn’t get a good grip, it’ll usually crack the seal apart making it easier to slide a small screw driver in to pry it down. Mine took two tries – the second time the screw gripped it very well and I was able to loosen the seal by pulling on the screw with some pliers. Be careful not to damage the soft brass in the group. You’re after the cheap seal, not the expensive group!

Trick 2: Clean everything:

It sounds obvious, but you really need soak and clean all the metal bits. Get some espresso machine cleaner – purcaff or similar and soak all the parts. My group has a metal basket and a spray nozzle screw that I clean along with my portafilter baskets. After they soak a bit, a soft brass brush can be useful for getting stubborn bits off.

Trick 3: (My new one) Lubricate the PF seal before installing it:

This may sound odd, but I figured that I’d give it a shot. I had some high temp food safe lubricant that I bought just for the pivot in my E61 group. It’s a special item that I bought from Chris’ Coffee. I put a tiny dab on the seal and rubbed it all over the top and sides of the seal. Think lightly greased cooking pan thin.

Trick 4: installing the seal:

After that, I used a portafilter to push the seal into place – but I took out the coffee basket first. This’ll let you use the PF to push the seal into place without much work. Then put a basket into the filter and use it to push the seal all the way in. (On the giotto, there’s a basket that goes into the top of the group – you put the seal around it before installation)

« Older entries

 Newer entries »